A Beginner's Guide to Landscape Astrophotography
When I first became interested in photography there were two main subjects that I was excited to capture - landscapes, and the stars. At that time I knew nothing about the science and practice of photography, I just knew that I needed to get out into nature and photograph the Milky Way like I had seen in dozens of stunning, professional astrophotography photos.
I am going to give you a quick primer on what you need to get started with astrophotography including the equipment you will need, how to configure your camera settings, and how to edit in post production. I will also provide tips on where you can go to optimize your chances for a pristine Milky Way shot and some additional resources that you can use in your quest for your shot. This article is intended to be a jumping off point for those looking to shoot their first few star photographs, so I won’t go in depth on many subjects. However there may be something in here for even the experienced astrophotographer, and additional resources to advanced courses can be found at the end of the article.
The Equipment
At the very least you will need:
A DSLR camera or mirrorless camera with a manual mode function, a shutter speed of at least 20 seconds (up to “bulb” mode is preferred), and the ability to photograph with an ISO setting of at least 10,000. A super fancy, expensive camera is absolutely not necessary - lots of the photos on this post were captured with a Nikon D3200!
Note - as of the time of this writing the new Google Pixel 4 has the ability to take astrophotographs. There are also smaller compact cameras like the Sony RX100 series that can accomplish this.
A wide angle lens.
There are tons of options out there. You’ll ideally want to look for something with a focal length of 20mm or lower with a minimum aperture of f/2.8.
A great budget option is the Rokinon 14mm f/2.8 wide angle lens.
A sturdy tripod.
It can be easy to go cheap here, but I recommend investing in a decent tripod with an adjustable ball head. This ensures that your precious camera will be safe and sound, eliminates unwanted movement, and also allows you to recompose your image easily. At a minimum, something like the Promaster Scout series is a solid choice.
If you don’t have a budget and want to go with a high end tripod that will serve your for decades to come, I would recommend the Peak Designs Travel Tripod.
For a lightweight, sturdy tripod that won’t break the bank, I would highly recommend the Sirui TS-025S Tripod. I absolutely love this tripod, and is a close runner up to the PD Travel Tripod for half the cost.
Headlamp (ideally with red light mode to minimize your eye’s sensitivity to light.
You’ll also want to make sure you are prepared to spend some extended time outside at night. Pack snacks, caffeine, and a warm jacket!
There are plenty of additional tools and trinkets that you can buy to improve your photographs, but for the beginner looking to get out and take their first photos, these three items will do just fine! I usually only use these three items on most shoots anyways, especially because I’m either hiking or mobile and can only carry as much gear as I can fit into a bag.
Researching Conditions and Location
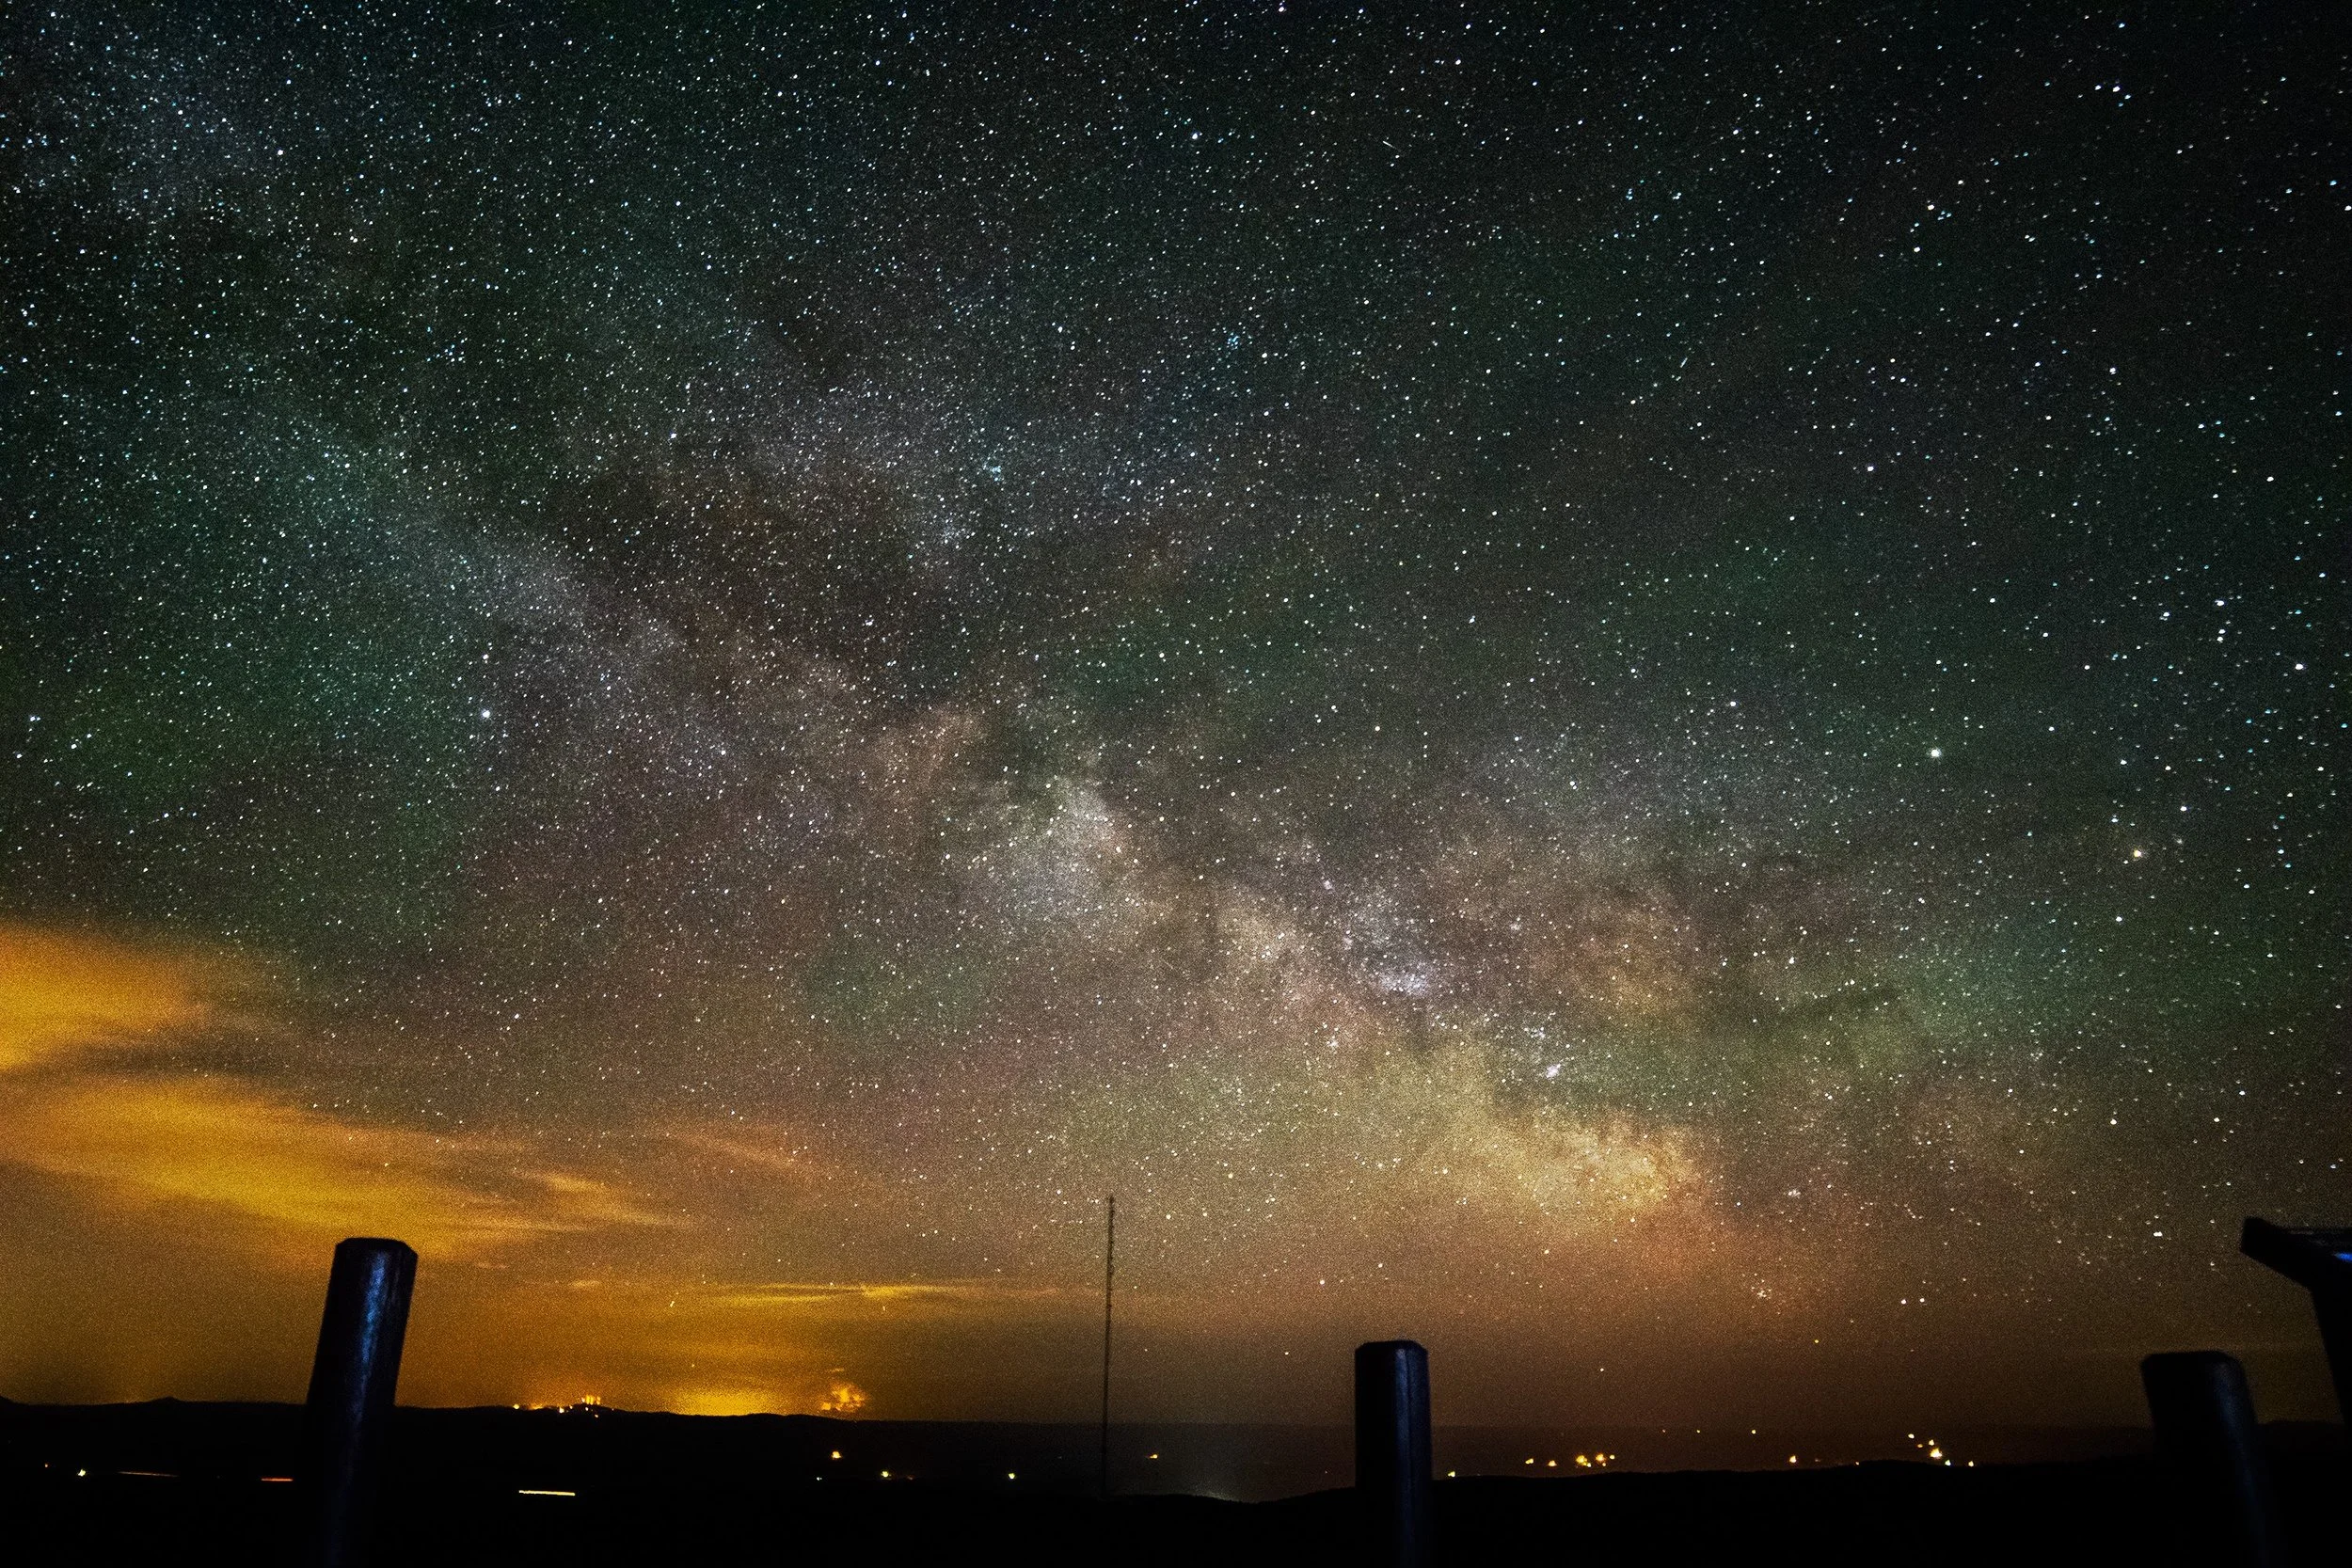
Like most people I have lived in urban areas for most of my life. Depending on the city or town you can still see some stars, but nothing compares to the first time you look up to the sky and see the Milky Way stretching across the roof of the Earth like a river of light. Just like your eyes, your camera will “see” the stars better if there is less light pollution. Naturally, if you’re in the middle of a huge city, your photos of the sky will be blown out by the bright lights and you will be left with a less than stellar capture. Whenever I’m going camping or going on a road trip I always research the position of the stars as well as the amount of light pollution in the areas I will be to get an idea of what conditions will be like.
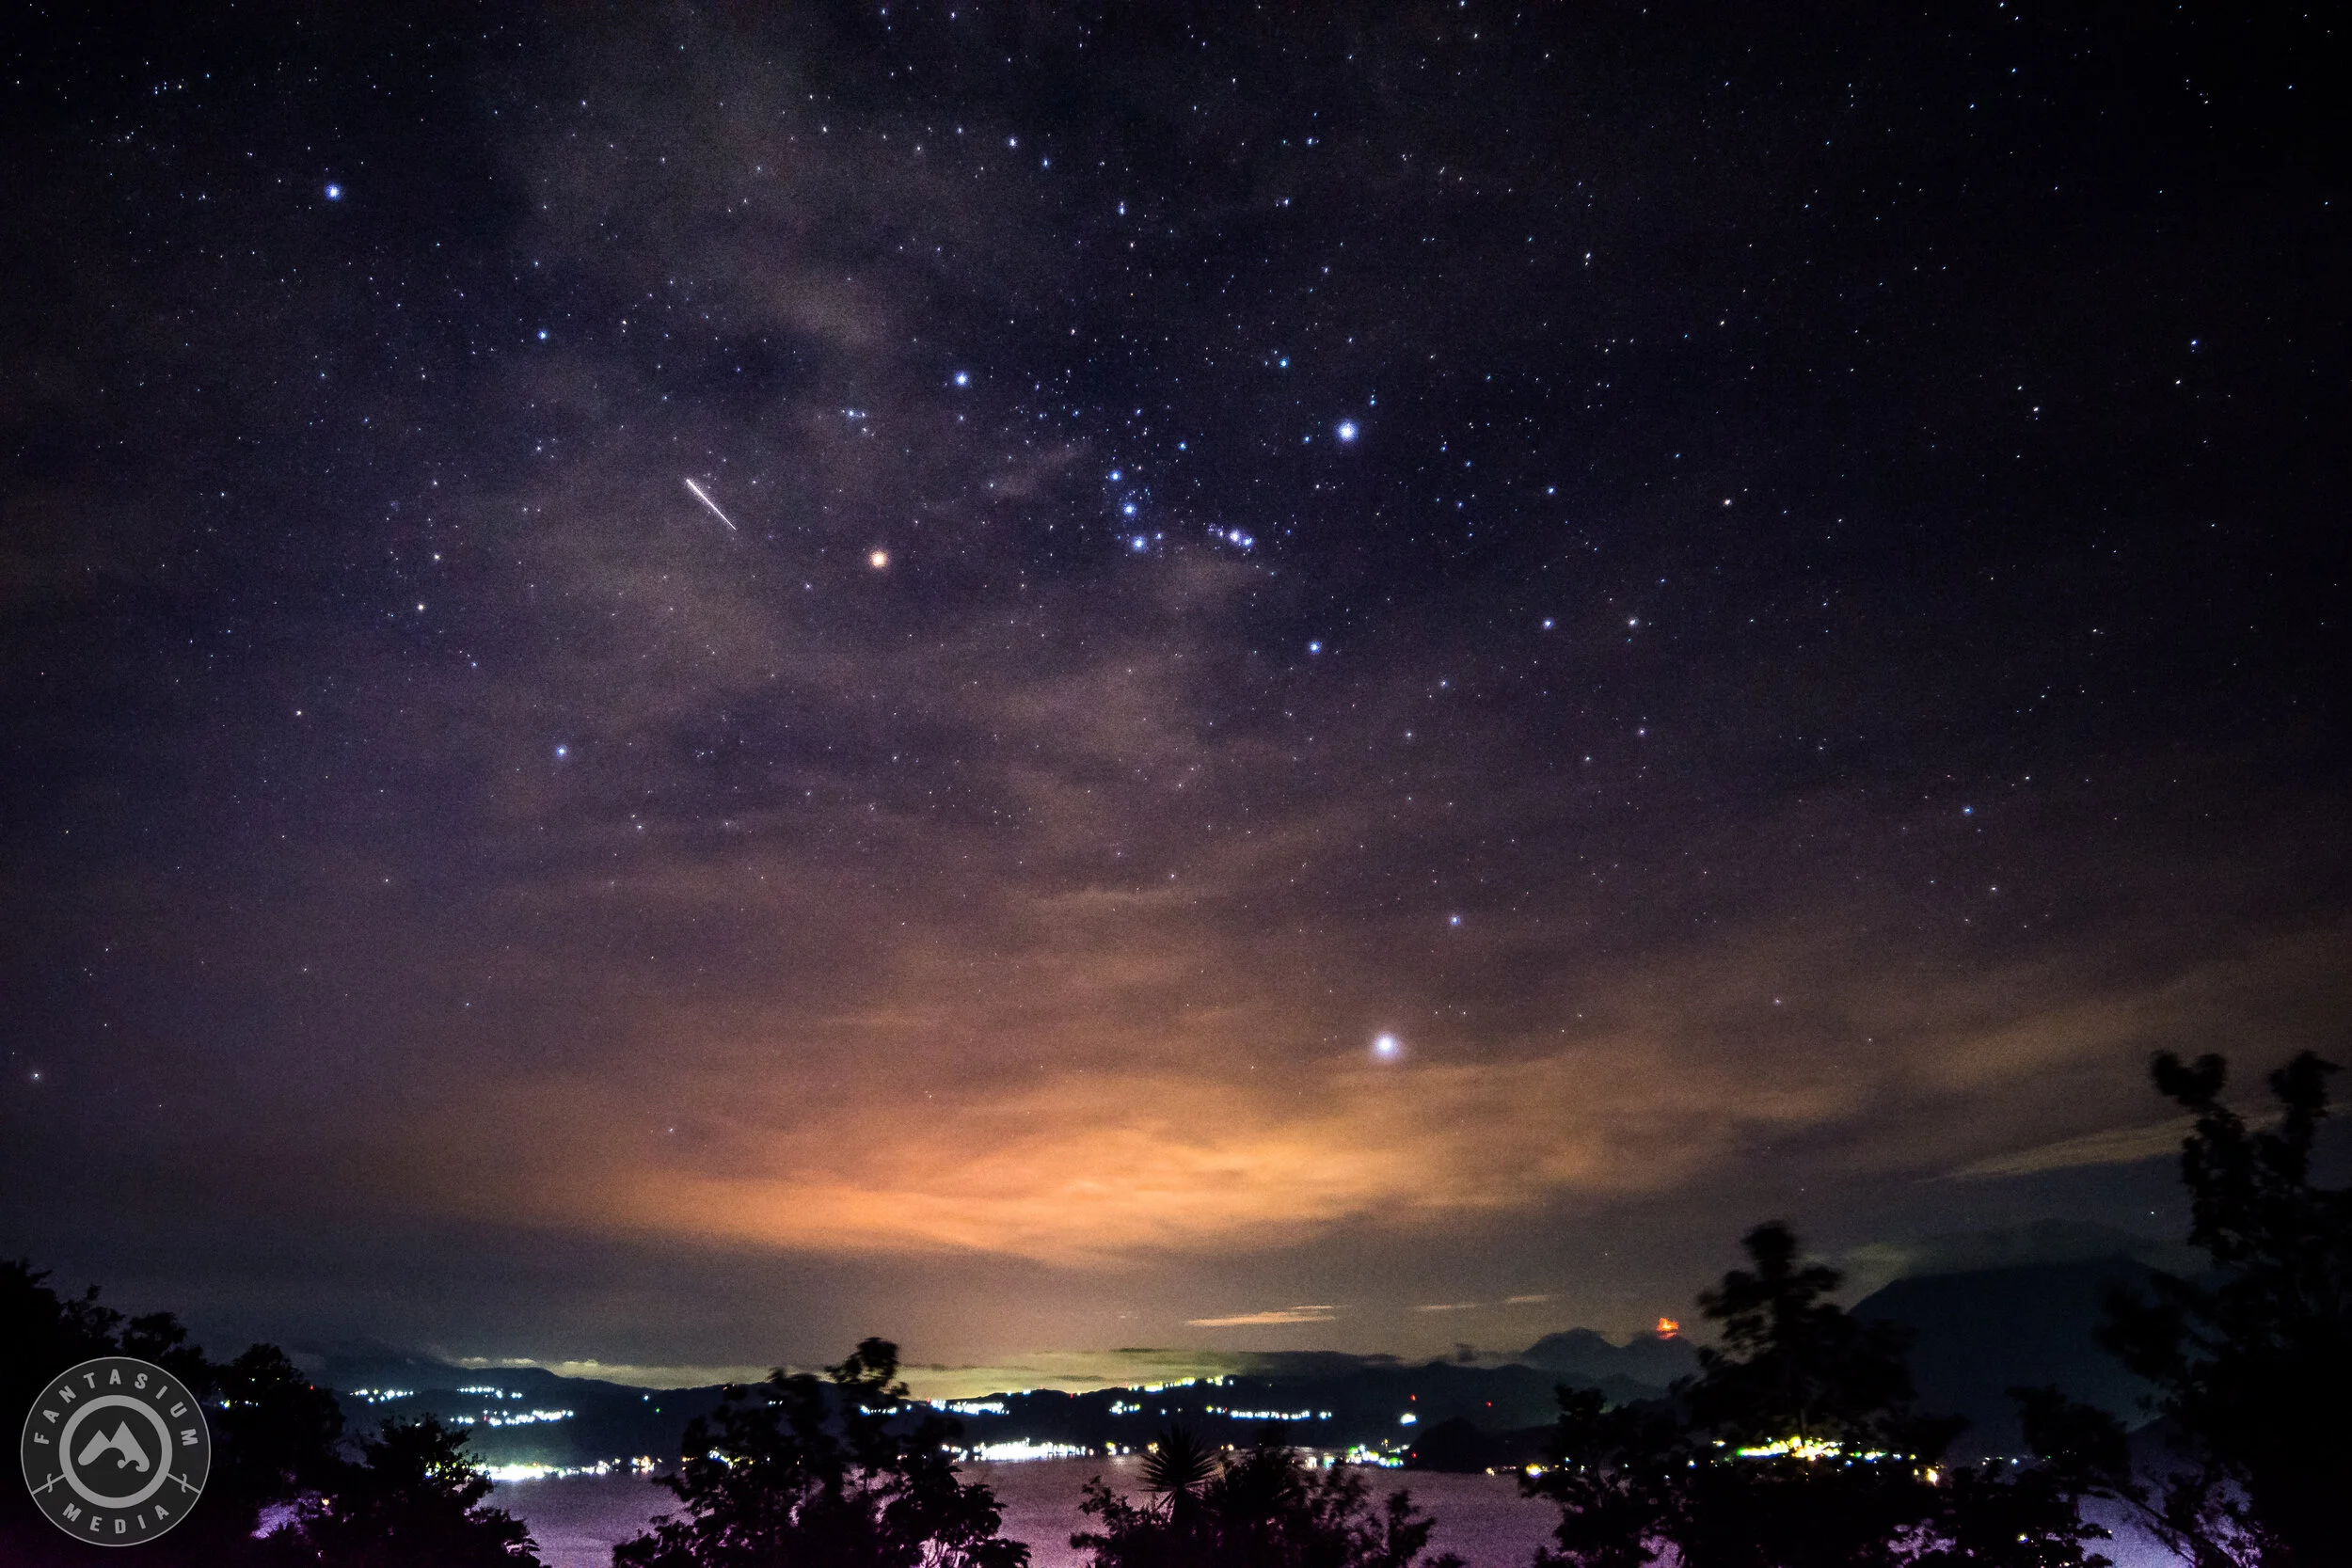
Another important thing to take into consideration is the phase of the moon. Just like city lights, the moon can blow out the stars and steal the show. When trying to capture the Milky Way or a constellation I always, when possible, shoot on a new moon. However, sometimes the moon can light up the landscape and literally make the picture look like it was taken in broad daylight. Before going out to shoot it can be helpful to get an idea of what the moon phase is and when it rises/sets so you can time your photos accordingly. Many times the darkest time of night comes at the dead of night - make sure you get that alarm set to maximize your sleep and stargazing time!
Taken at a near full moon in the BWCA. You can see the Milky Way running from the top right to bottom left of the photo - without the moon’s interference it would be much more pronounced.
Finally, the weather is obviously an all important determiner of stargazing conditions. Lots of clouds = no stars. Many a stargazing mission can be ruined by the weather. Be prepared to wait for the perfect window for shooting.
For determining conditions I can’t recommend Sky Guide enough. It’s cheap, easy to use, and it looks amazing. You can view constellations locations, determine weather conditions, the positioning of celestial bodies, and find locations that have the least amount of light pollution. The creator of Sky Guide spent years traveling the world taking over 30,000 photos of the night sky to create the application, so you know there is tons of experience and knowledge behind it.


Getting the Shot - Configuring Your Camera Settings
There are two aspects to getting a National Geographic-esque star photo. The first are your camera settings. It’s important to remember that we are trying to capture light rays that are coming from millions of light years away. It’s quite difficult for our camera to pick up that small amount of light with settings we would use during the day time. When we think about the basics of our exposure triangle, we are reminded that there are a few ways we can let more light into the camera - 1) increase our ISO, 2) keep our shutter open longer, and 3) open up our aperture wider. We will use a combination of all three of these to capture those heavenly bodies.
Each situation is going to require slightly different camera settings. We also need to take into effect any creative styles you might be going for in your shot, like star trails. There will be some trial and error involved in the first few shots. To start, you will want to ensure your camera is set to shoot in Manual Mode. This is indicated by the M on the shooting mode dial on your camera. I usually begin with my settings at a shutter speed of 15 - 25 seconds, ISO of around 2500, and the aperture one stop above the widest setting. Once the shot is captured I review and revise my settings as necessary. You can do a whole bunch of creative things with different settings. High ISO settings will add more noise to your photographs but will allow you to have a shorter shutter speed and close your aperture a bit, which can sharpen up your photos. Higher shutter speeds can introduce star trails, which can dilute a picture intended to be tack sharp, but they can also be a fun and creative way to photograph the stars.
A tried and true rule of determining a starting shutter speed is the rule of 500. The rule of 500 goes as follows:
500 ÷ Focal Length of Your Lens = The Longest Exposure (in Seconds) Before Stars Start to Trail
So, for example, if you’re shooting with a 18mm lens our rule of 500 formula would be (500 ÷ 18) = 27 seconds (always round down). So based on this we know that we can start with a shutter speed of at most 27 seconds before we start to see star trails. On another note - star trails can be a fun, creative way to change up your astrophotography! If you’re interested in how to create star trails we will be going over that topic in a future article.
Shoot RAW
I know I promised that we wouldn’t get too technical and keep things in layman’s terms, but it’s important that we change at least one major setting on our camera before shooting our stars*. Out of the box most cameras create a JPEG file when capturing an image, which makes for quick and easy sharing. For our purposes we need to make sure that our camera is setup to create the exposure in a RAW image file. These files contain much more image information and are crucial when we get to the post processing phase.
*Most photographers would tell you ALWAYS SHOOT RAW for the same reason we are here - more image information = more post processing power and higher image quality.
Focusing
Cameras use light to operate their autofocus, and due to the dark skies we will be pointing the camera towards naturally our autofocus capabilities will not function. Manual focus it is!
This is an extremely important point to make sure you get right. Just like our cameras humans can have difficulty focusing on the faraway stars at dark. After all, cameras have a tiny little screen on them. A great way to make sure your stars are in focus is by activating the live view of your camera, then clicking the zoom button. This will allow you to zoom in on a specific star, then adjust your focus until it’s sharp. Boom! All of the rest of your stars will also be in focus.
Another handy way to make sure you get that focus set correctly every time is to go out and activate the live view, and zoom in on an extremely far away subject. Then you can focus on the subject, and mark the focus point on your lens clearly. That way when you’re out at night next time and it’s too dark to read the indicators on your lens you know exactly where to set the focus at.

In this image you can see that all of the other conditions were right, but my camera was out of focus. Sometimes it’s tough to tell until after you view the images on a screen - make sure you’ve got your focus point down before going out to shoot!
Auto White Balance
Most of the time cameras will come set with the white balance in auto mode, but double check this on your camera before shooting. We can adjust the white balance in post processing.
Minimize Camera Movement
When shooting with a shutter speed higher than around 1/50th of a second the slightest movement of the camera or subject can create motion blur in the end exposure. It’s important to ensure that our camera is completely still when we are shooting a long exposure. There are a few ways to accomplish this.
The first is by using the delay setting on your camera. Most cameras have a setting that will allow you to set the camera to take the photo X seconds after the shutter button is pushed. Usually 2 seconds is enough (of course, use extreme finesse when pushing the shutter button), but most cameras have the option to increase this if you want to be on the safe side. For those who want to get out right away and not purchase any additional accessories, this option works just fine - I still use it the majority of the time when capturing a single exposure.
Another option is to get a remote shutter release. This will minimize any post shutter button shake in the camera and can come in handy for other scenarios like portraits and self photos as well.
The third and final option is what is called an intervalometer. An intervalometer is a device that plugs into your camera and allows you to not only trigger the shutter remotely, but it also gives you the ability to customize the number of photos you take, the length of each exposure, and the amount of exposures you want to shoot. If you know you are going to be hooked with astrophotography, an intervalometer is the way to go. It will not only come in handy for single exposures, but will allow you to capture star trails, stacked images, time lapses, and more.
Getting the Shot Pt 2 - Composing Your Photo
Once you have the camera settings down, the next thing to think about is composing your photo. There is no arguing that the celestial bodies are the “stars” of the shoot, but the big role player in the scene is the foreground and other points of interest. Having an interesting object or a person can give your photo a context point to compare the scene behind it to while simultaneously providing a way for your viewer to witness the amazing skies just as if they were there with you as you were taking the photo. It’s incredibly important to carefully consider your foreground subjects and how you want to work that into your shots.
This is less of a technical subject and more about personal taste. As you gain experience shooting you’ll learn what you like to use as the foreground and start to delve into more advanced ways of capturing exactly what you imagined when you stepped outside.

Post Processing
This is a topic that can get extremely in depth and complex. It’s possible to utilize advanced post processing techniques and devote hours to editing a single photo. However, there are several quick and easy adjustments that you can make to your photograph that will help enhance your image. There are many photo editing applications out there, but I use Lightroom for my local edits. I will utilize Photoshop for more advanced edits, but here we will stick with Lightroom. Many times you can get what you are looking for with just a few adjustments.
Keep in mind that many of these adjustments can change based on the specific photograph as well as your personal tastes. However, in general, starting with these adjustments will help bring out detail in your stars and increase their sharpness.
Adjust White Balance to neutral
Increase contrast
Decrease highlights
Increase whites
Increase texture
Increase clarity
Tone Curve:
Adjust highlights as necessary
Decrease darks, shadows
Enhance sharpening, add masking
Add noise reduction, detail
Remove chromatic aberration
Finally…Get Out and Shoot!
It may seem like there is a lot that goes into landscape astrophotography, but after you’ve done it once or twice the rest of it comes almost naturally. The most difficult part is motivating yourself to get out of our warm sleeping bag or house and stand in the cold for hours while you capture the images! Once you push the shutter button and see what comes out of your camera, however, if you’re anything like me you’ll be hooked immediately.
This is just the start of astrophotography. There are tons of advanced techniques that you can get into that will take your photography to the next level and help you produce even more stunning images. You’ll also learn a lot about the cosmos, nature, and yourself while you’re at it. So on the next clear night, don’t cheat yourself - get out and take some shots!
Advanced Topics
As we are are able we will be creating articles that go over advanced astrophotography topics. These include but are not limited to:
Star tracking
Stacking shots for foreground composition
Stacking shots for Noise Reduction
Panoramas
Motion timelapses
Painting with light
If there is anything in particular you want to see let us know!

Until Next Time.


